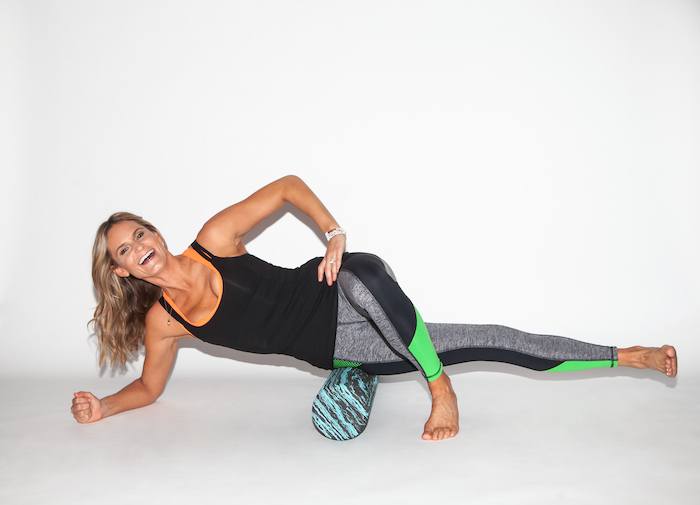
6 Expert-Approved Foam Roller Exercises for Keeping Stress in Check

Originally posted: February 14th, 2016, Well + Good
By: Erin Magner

If you only bust out your foam roller to combat post-workout soreness, you’re missing out on one of its key benefits: stellar stress relief.
“There’s research that shows [foam rolling] helps to calm the nervous system,” says Lauren Roxburgh, a top Los Angeles-based body alignment specialist who has worked with stars (Gwyneth Paltrow) and athletes (LeBron James) alike. “When you use the roller, you can address acupressure points that are connected to the adrenals. And creating elasticity in the muscles and fascia [can help] deepen the breath, which brings your body to a more calm state of being.”
 Roxburgh is so convinced of the mind-body benefits of rolling out that she devoted an entire half of her new book to this aspect of the practice. Titled Taller, Slimmer, Younger: 21 Days to a Foam Roller Physique, the book presents a daily program of foam rolling exercises, with days 11 through 21 dedicated to topics like getting grounded, reducing stress-related tension, and releasing negative emotions. (Check, check and check.)
“Rolling is essential because we’re dealing with more stress and toxins than ever,” explains Roxburgh. “It’s a form of mindful movement like yoga-it brings you into your body, and I think that’s a real benefit.”
Below, discover six of Roxburgh’s favorite stress-reducing roller moves, all of which can be done at home and at work-just close your office door and tell the boss you’re on a call.

Rolling Swan
Those prone to road rage, this one’s for you. “When we’re angry or stressed, we pinch our arms into our armpits and we tighten up that whole area of the body,” says Roxburgh. “Extending the arms in swan helps release any anger stored in the sides of the body.”
How it’s done:
1. Lay belly-down on the mat, with arms long in front of you and the roller placed underneath your elbow joints, thumbs facing up.
2. Inhale and roll the roller toward you, extending the spine and lifting as you roll your shoulders back (taking care to keep your glutes relaxed the entire time so you don’t jam your low back while lifting up). Be sure to pull your abs up and in to support your back and elongate the front of your body.
3. Exhale as you slowly resist on the way down, returning to the position you started in. Repeat 8 times.

Diaphragm Release
“It’s all about breath when it comes to anger and uptightness,” says Roxburgh. Opening up the diaphragm has a cooling effect, she says, as it allows us to breathe more deeply. (Not to mention that this one feels so good, you can’t possibly be grumpy at the end.)
How it’s done:
1. Place the roller underneath the bottom of your shoulder blades at the bra line. Gently interlace your fingers and bring your hands behind your head to support your neck. Place your feet on the ground, with knees bent and feet hip width apart.
2. Inhale as you arch your thoracic spine (middle-to-upper back) over the roller.
3. Exhale as you curl back up as if you were doing a crunch, squeezing all the air out of your stomach. Repeat 8-10 times.

Reverse Dip Arm Extension
Who knew that tricep dips give you more than sexy arms? “The anxiety acupressure point is right in the middle of the chest,” says Roxburgh. “This exercise helps free up blocked energy.”
How it’s done:
1. Bring the roller behind you and your hands to the roller, palms down, shoulder-width apart, with your thumbs facing inwards.
2. Open your chest, heart, and collarbones, lengthen your neck, and draw your shoulders back. Then press your feet firmly on the floor with knees bent and hips up in the air.
3. Keeping the roller stable and your core engaged, inhale as you slowly bend your elbows behind you and exhale as you press up to a soft elbow, taking care to avoid locking the elbow joints. Repeat 10 times.

Rolling Mermaid Twist
“This is one of my favorites-it wrings out the organs and has the same benefits you get from pigeon, but it’s a little easier to get into,” says Roxburgh. In other words, think chest- and hip-opening, spinal alignment, and sweet, sweet emotional release.
How it’s done:
1. Place your right shin in front of you and your left shin out to the left so that your knees are staggered. Place the roller to the right of you and put the palms of your hands on the roller. Reach and lift your sides and lift through the top of your head.
2. Inhale and roll the roller up your forearms to just below your elbows.
3. Exhale as you roll back up to the starting position. Repeat five times on one side, then repeat on the other side.
For the original post, visit Well + Good.


